As evidenced in my Mad about mushrooms post, Toadstools of all shapes and sizes make me a very happy mouse!
With that in mind it’s time for another spotty upcycling, crochet adventure!
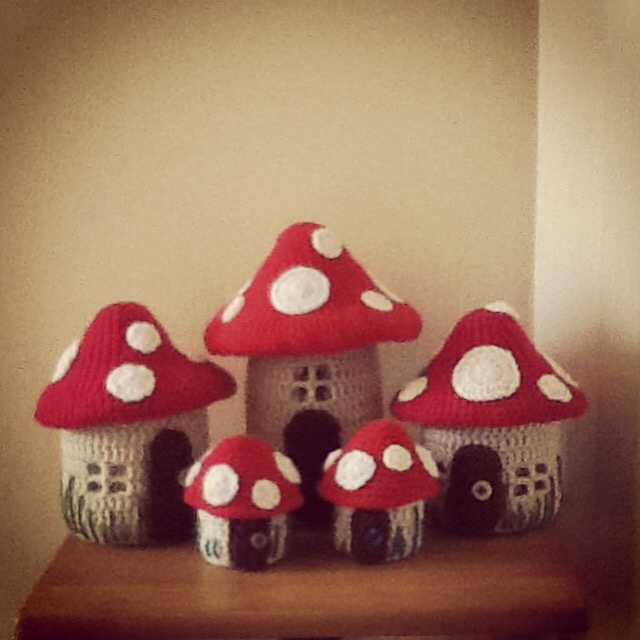
The Toadstool Nightlight!!
This is more of a how to than a pattern given that you may have a jar that is slightly smaller, taller, fatter or shorter than mine but you should be able to ‘tweak’ this basic pattern to fit your jar 🙂
You will need…
A clean empty jar (for this tutorial I used a standard sized 1lb jam jar)
A battery operated tea light – not to state the obvious but a normal tea light would be dangerous not to mention a one time only deal!
Red aran yarn
White dk yarn
Beige dk yarn
Brown dk yarn
Green yarn
Size 5mm, 3.5mm and size 3mm hooks
stitch marker
yarn needle
scissiors
small button
How to!
Chain 2 does not count as a stitch
With beige yarn and 3mm hook
rd 1: into a magic circle, chain 2 and dc 12 times , slip stitch into the top your first dc to close, pull the end to close the circle.
rd 2: chain 2 – dc twice into each stitch around then slip stitch into the top of your first dc to close
rd 3: chain 2 – dc into same stitch, *dc twice into the next stitch, dc into next stitch* repeat ** around, slip stitch into the top of your first dc to close.
At this point its worth checking to see whether your piece is the same size as the bottom of your jar. For my jar another round of dc would be too much so for this round I am going to change to hdc
rd 4: chain 1, hdc into same stitch, hdc into next stitch, *hdc twice into the next, hdc in each of the next two stitches* repeat ** around and slip stitch into the top of your first hdc to close.
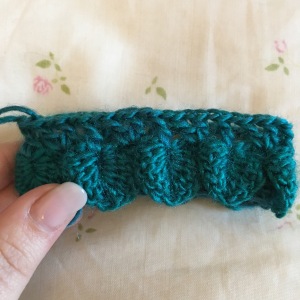
We are now going to begin to work up the sides of the jar
rd 5: Chain 2, and in the back loops only dc into the same stitch, in the back loops only dc into each stitch around, slip stitch into the top of your first dc to close
rd 6: chain 2, in both loops dc around and slip stitch into the top of your first dc to close
If you have a shorter jar than mine you may want to skip row 7 and instead move straight on to round 8
rd 7: chain 2 and dc into each stitch around then slip stitch into the top of your first dc to close
rd 8: in this round we begin to make the ‘windows’
chain 2 and dc into the same stitch, dc into the next 10 stitches, chain 2, skip two stitches, dc, chain 2, skip two stitches, dc, dc into the next 14 stitches, chain two, skip two stitches, dc, chain 2, skip two stitches, dc, dc into each of the remaining stitches then slip stitch into the first dc to close.
rd 9: chain 2 and dc in the same stitch, dc into the next 10 stitches, chain two, dc into the next dc, chain two, dc, dc in the next 14 stitches, chain two, dc into next dc, chain two, dc into each of the remaining stitches around and slip stitch into top of first dc to close
rd 10: chain 2, dc into each stitch around (including the chain stitches) slip stitch into the top of your first dc to close
rd 11: chain 2 and dc in each stitch around slip stitch into top of your first dc to close
repeat round 11 until you about one row away from the top of the jar for me this was 5 more rounds
rd 17-18: chain 1, sc in each stitch around, slip stitch into the top of your first sc to close – do not cut yarn
sew in your end at the bottom if you haven’t already and slip the jar into your crochet piece.
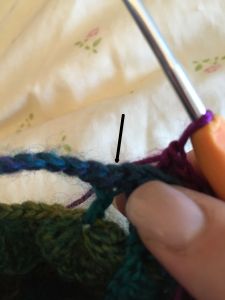
rd 19: switch to your 3.5mm hook and loosely slip stitch around, cut yarn and sew in end.
Door:
With brown yarn and 3mm hook
chain 6
row 1: sc into second chain from hook and in each stitch along chain 1 and turn (5 stitches)
row 2 – 6: sc into each stitch, chain 1 and turn
row 7: sc into each stitch, do not chain 1, turn
row 8, skip two stitches and dc 5 times into the next stitch, skip two stitches and slip stitch into the next stitch
do not turn
we are now going to work around the piece
chain one and work 6 sc evenly along the first side, sc twice into the corner, sc in the next 3 stitches, sc twice into the corner, work 6 single crochet along the next side evenly. Work one sc into the next stitch, 2sc into the next, sc into the next, 2 sc into the next and a final sc into the last. Slip stitch into the top of the next stitch to close, leave a long tail for sewing to the jar.
Sew your button onto the door wherever looks most pleasing to you then sew your door onto your beige cover in between the ‘window’ spaces. I like to line up the bottom of the door with rd 5 of the beige cover. Sew in ends.
Next up take a long length of green yarn and embroider on your ‘grass’ around the jar.
Toadstool Top:
with red aran yarn and 5mm hook and working continuously in the round ( ) indicates number of stitches you should have at the end of each round,
rd 1: place 6 sc into magic circle (6)
rd 2: 2 sc in each st around (12)
rd 3: *sc in next, 2 sc in next* repeat ** 5 more times (18)
rd 4: *sc in next two st, 2sc in next* repeat ** 5 more times (24)
rd 5: sc in each stitch around (24)
rd 6: *sc in next three st, 2 sc in next* repeat ** 5 more times (30)
rd 7: sc in each stitch around (30)
rd 8: *sc in next four st, 2 sc in next* repeat ** 5 more times (36)
rd 9: sc in each stitch around (36)
rd 10: *sc in next five st, 2 sc in next* repeat ** 5 more times (42)
rd 11: sc i each stitch around (42)
rd 12: *sc in next 6 st, 2 sc in next* repeat ** 5 more times (48)
rd 13: sc in each stitch around (48)
rd 14: *sc in next seven st, 2 sc in next* repeat ** 5 more times (54)
rd 15: sc in each stitch around (54)
rd 16: *sc in next eight st, 2 sc in next* repeat ** 5 more times (60)
rd 17 – 19: sc in each stitch around (60)
ss to close and sew in ends
Spots:
with white wool and 3mm hook:
Make 3 – into a magic circle, chain 2 and dc 12 times, slip stitch into the top of your first dc to close, leave a long tail for sewing the spot to the top.
Make 3 – into a magic circle, chain 2 and dc 12 times, slip stitch into the top of your first dc, chain 1, hdc twice in each stitch around, slip stitch into the top of your first hdc to close, leave a long tail for sewing the spot to the top.
Arrange your spots on your top in a way that you like the look of and sew them to the top using the tails.
Pop your battery operated tealight into the jar, put the top on the jar and you have your very own toadstool nightlight 🙂

Happy crocheting 🙂
anonymouse x