Oops! It would appear that I have left this blog alone for far longer than anticipated! The last year has been a rollercoaster! I had to move house as my landlord was selling up, there was the suspected brain tumour, my folks in and out of hospital and new editions to the family since I last wrote about my crochet adventures here.
Meet Oswald and Frank my new kitten and Gecko!
Though I have been crocheting I have been crazy busy settling in and adapting to my new life. That was until I saw the most gorgeous gloves pop up on my facebook and had to try and make my own.
There are several patterns for ‘dragonscale gloves’ on ravelry but I wanted to see if I could figure out a way to make them myself. So far I have made 3 pairs for myself and xmas gifts (best to start on those early after last year ended up rushed and with a nasty case of carpal tunnel!)
Anyways that is enough about me – on to the pattern!
You will need:
1 ball of Yarn – I used King Cole Riot DK, I love the colours and that it is thin so the crocodile stitches round the palms do not get too bulky which would be annoying
3.5mm and 3mm hooks
Scissors
Needle to weave in ends
The stitches: I use American crochet terms throughout
Ch = chain
SS = slip stitch
SC = single crochet
HDC = half double crochet
DC = double crochet
V = DC, ch1, DC in same stitch
Crocodile stitch:
You will also need to know how to do the crocodile stitch – I have tried to include pictures and instructions but if you are new to this stitch (as I was) you can find a fantastic beginners tutorial from Red Heart Yarns here… Crocodile stitch tutorial
Granny stitch
The granny stitch is three dc’s into the same stitch
The Pattern!
Round 1 – Using your 3.5mm hook chain 36 then making sure the chain is not twisted, slip stitch into the beginning chain to create a circle (to make the gloves larger or smaller chain fewer or more stitches making sure they are a multiple of 4).
Round 2 – Ch1 and SC into the same stitch then place one single crochet in each chain around, SS into the first SC (36 st)
Round 1
Round 2
Switch to your 3mm hook
Round 3 – Chain 4 (counts as dc + ch1) and dc into same stitch (your first V stitch), ch 1, skip the next stitch and dc into the next, *ch1, skip the next stitch and V stitch into the next, ch 1, skip the next stitch and dc into the next * repeat around – you should end on a dc stitch, ch1 and slip stitch into the 3rd chain of your chain 4. ( 9 ‘v’ and 9 dc’s)
Beginning of round 3
Round 3 completed
Round 4 – time for the first crocodile stitch!
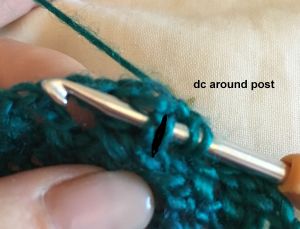
You will be crocheting around the posts of the dc’s – 5 dc’s down one side of the V, chaining one then 5 dc’s up the other side of the V.
Yarn over hook, insert hook under the first dc of your first V, yarn over, pull yarn through two hoops. Yarn over, pull yarn through the remaining two hoops, repeat 4 more times working down the post,
Chain 1, you will now do the same up the second dc post of the V
The posts of the V stitch Dc around the first post FIrst DC done Second post of the V DC around the second post
5 dc’s around each of the postsSlip stitch around the post of the next dc
Repeat around creating crocodile stitches around the V’s and anchoring them in place by slip stitching around the posts of the dc’s until you have gone all the way around – on the last slip stitch, instead of stitching around the dc post slip stitch into the top of the stitch. ( 9 crocodile stitches)
Slip stitch into top of stitch shown Round 4
Round 5 – Chain 4 and dc into same stitch, *ch1 and dc into space of next crocodile stitch, ch1 and V stitch into the top of the dc from the last round* repeat from * to * around, SS into 3rd chain of chain 4
DC into space shown (middle of Crocodile stitch) V stitch into space shown (DC from last round)
Round 5
Round 6 – Repeat rd 4
Round 7 – Repeat rd 3
Round 8 – Repeat rd 4
Round 9 – Repeat rd 3
Round 10 – Repeat rd 4
Round 11 – Repeat row 3
Round 12 – Repeat row 4
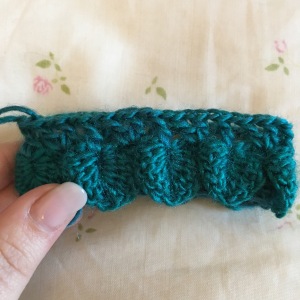
You should now have 5 rows of crocodile stitch – this is long enough me but feel free to add more rows if you want longer finger and hand parts of the gloves.
Round 6
Round 8
Round 10
Round 12
Round 13 – chain 4 and dc into same stitch, ch1, dc into the middle of the next crocodile stitch , ch 10 (this begins the thumb shaping), skip one crocodile stitch and dc into the center of the next crocodile stitch, *ch 1 v stitch into the dc from the previous round, ch1 and dc into the middle of the next crocodile stitch* repeat from * to * around, slip stitch into the 3rd chain of your chain 4
Skip marked stitchRound 14 – ch 1 and make a crocodile stitch around the V – then SC into the top of the next dc, SC in each chain across and into the top of the next dc (12 SC in total), make a crocodile stitches the same way as you have done for previous rounds and then SS into the top of your last dc.
Single crochet into marked stitch Single crochet across Round 14Round 15 – In this round you will be switching from Crocodile stitch to Granny Stitch. I like to make sure my work is turned so that the wrong side is facing me – this helps to hide the slip stitches made during the granny stitch stage of the gloves.
Ch 3 and dc twice more into the same stitch, dc three times into the middle of the next crocodile stitch, find the SC you did into the top of the dc in the previous round – dc that and the next SC together, dc2tog 5 more times, you should now have 6 dc2tog in total. *Dc 3 times into the middle of the next crocodile stitch, dc 3 times into the top of the dc from previous round* , repeat ** around and slip stitch into the top of your chain 3.
Wrong side Single crochet from previous round 6 DC2tog completed Granny stitch into marked stitchRound 16 – Slip stitch across to the next gap, Chain 3 and dc twice more into the same space, dc three times into the next gap, Skip the next stitch then dc2tog the next two stitches, dc2tog the next two stitches, then dc 3 times in the gap between the dc2tog and granny stitch from previous round, continue to 3dc in each gap around SS in top of chain 3
Granny Stitch into the gaps marked Skip the marked stitch How the thumb shaping should look in this round
Round 17 – Slip Stitch to the next gap, ch 3 and 2 dc in same space, granny stitch into the next space, skip both dc2tog and granny stitch into the next gap, granny stitch in each gap around, SS into top of chain 3
Granny stitch into marked gap How thumb shaping should look this round Round 17Round 18 – Slip stitch to next gap, ch 3 and dc twice into same gap, Granny stitch in each gap around, slip stitch into top of chain 3.
Repeat round 18 until you reach the desired length – I have found that 13 more rows are perfect for me and with this wool ensures the colour change is not too different when you make the second glove.
I finished off with a round of hdc but you can add any border you fancy!
All that’s left to do is weave in those ends. The second glove is made in exactly the same way!
I hope this all makes some sort of sense – apologies for the picture quality, let me know if you find any mistakes!!
Over christmas I was talking with my cousin about my crochet and he requested that I make him some cushions. After much deliberation he decided that what he really wanted was to turn his sofa into a ‘fruit bowl’ – yes seriously! He wanted 10 cushions and the only stipulation as to what fruit was that there must be amongst them a banana.
Whilst planning this fruity commission I needed to think about a few things such as a variety of shapes, colours and how to make the cushions easily identifiable as fruit. I ended up with this list of 10: Banana, pineapple, grape, watermelon slice, kiwi slice, apple, strawberry and slices of orange, lime and lemon.
Todays post is about the lemon, orange and lime cushions I will save the others for a later post.
Next step was to order wool! I wanted to make the cushion covers to feel soft and substantial so decided on aran/worsted weight wools from red heart, lion brand and stylecraft. The trickiest wool colour to find was the right yellows given that I was also making a banana so needed different distinct shades. There seems to be quite a lack of variety in affordable (read cheap!) yellows but eventually I settled on stylecraft special aran in lemon and Lion brand vannas choice in radiant yellow for the lemon, Lion brand vannas choice in lime and Kelly green for the lime and Lion Brand vannas choice in radiant orange for the orange. I used stylecraft special aran in white for all three to represent the ‘pith’.
I also ordered cushion inners in various shapes and sizes, for the slices I ended up using round 16inch inner pads (from amazon).
Whilst waiting for my materials to arrive I set about looking for inspiration/patterns to help with the completion of what was looking like quite a mammoth task. I don’t know if I was looking in the wrong places but crochet fruit cushions do not appear to be a ‘thing’. I found a few sewn ones, lots of amigurumi fruit but not so many cushions.
Materials
materials
You will need…
One 100g ball of the colour of your choice for the ‘skin’ of the fruit (mine was vannas choice radiant yellow – Colour A)
0ne 100g ball of the colour of your choice for the flesh of the fruit (mine was stylecraft special aran in lemon – Colour B)
One ball of white aran weight yarn
Crochet hook – I used a 5/H one
Darning needle
16inch inner cushion pad
Scissors
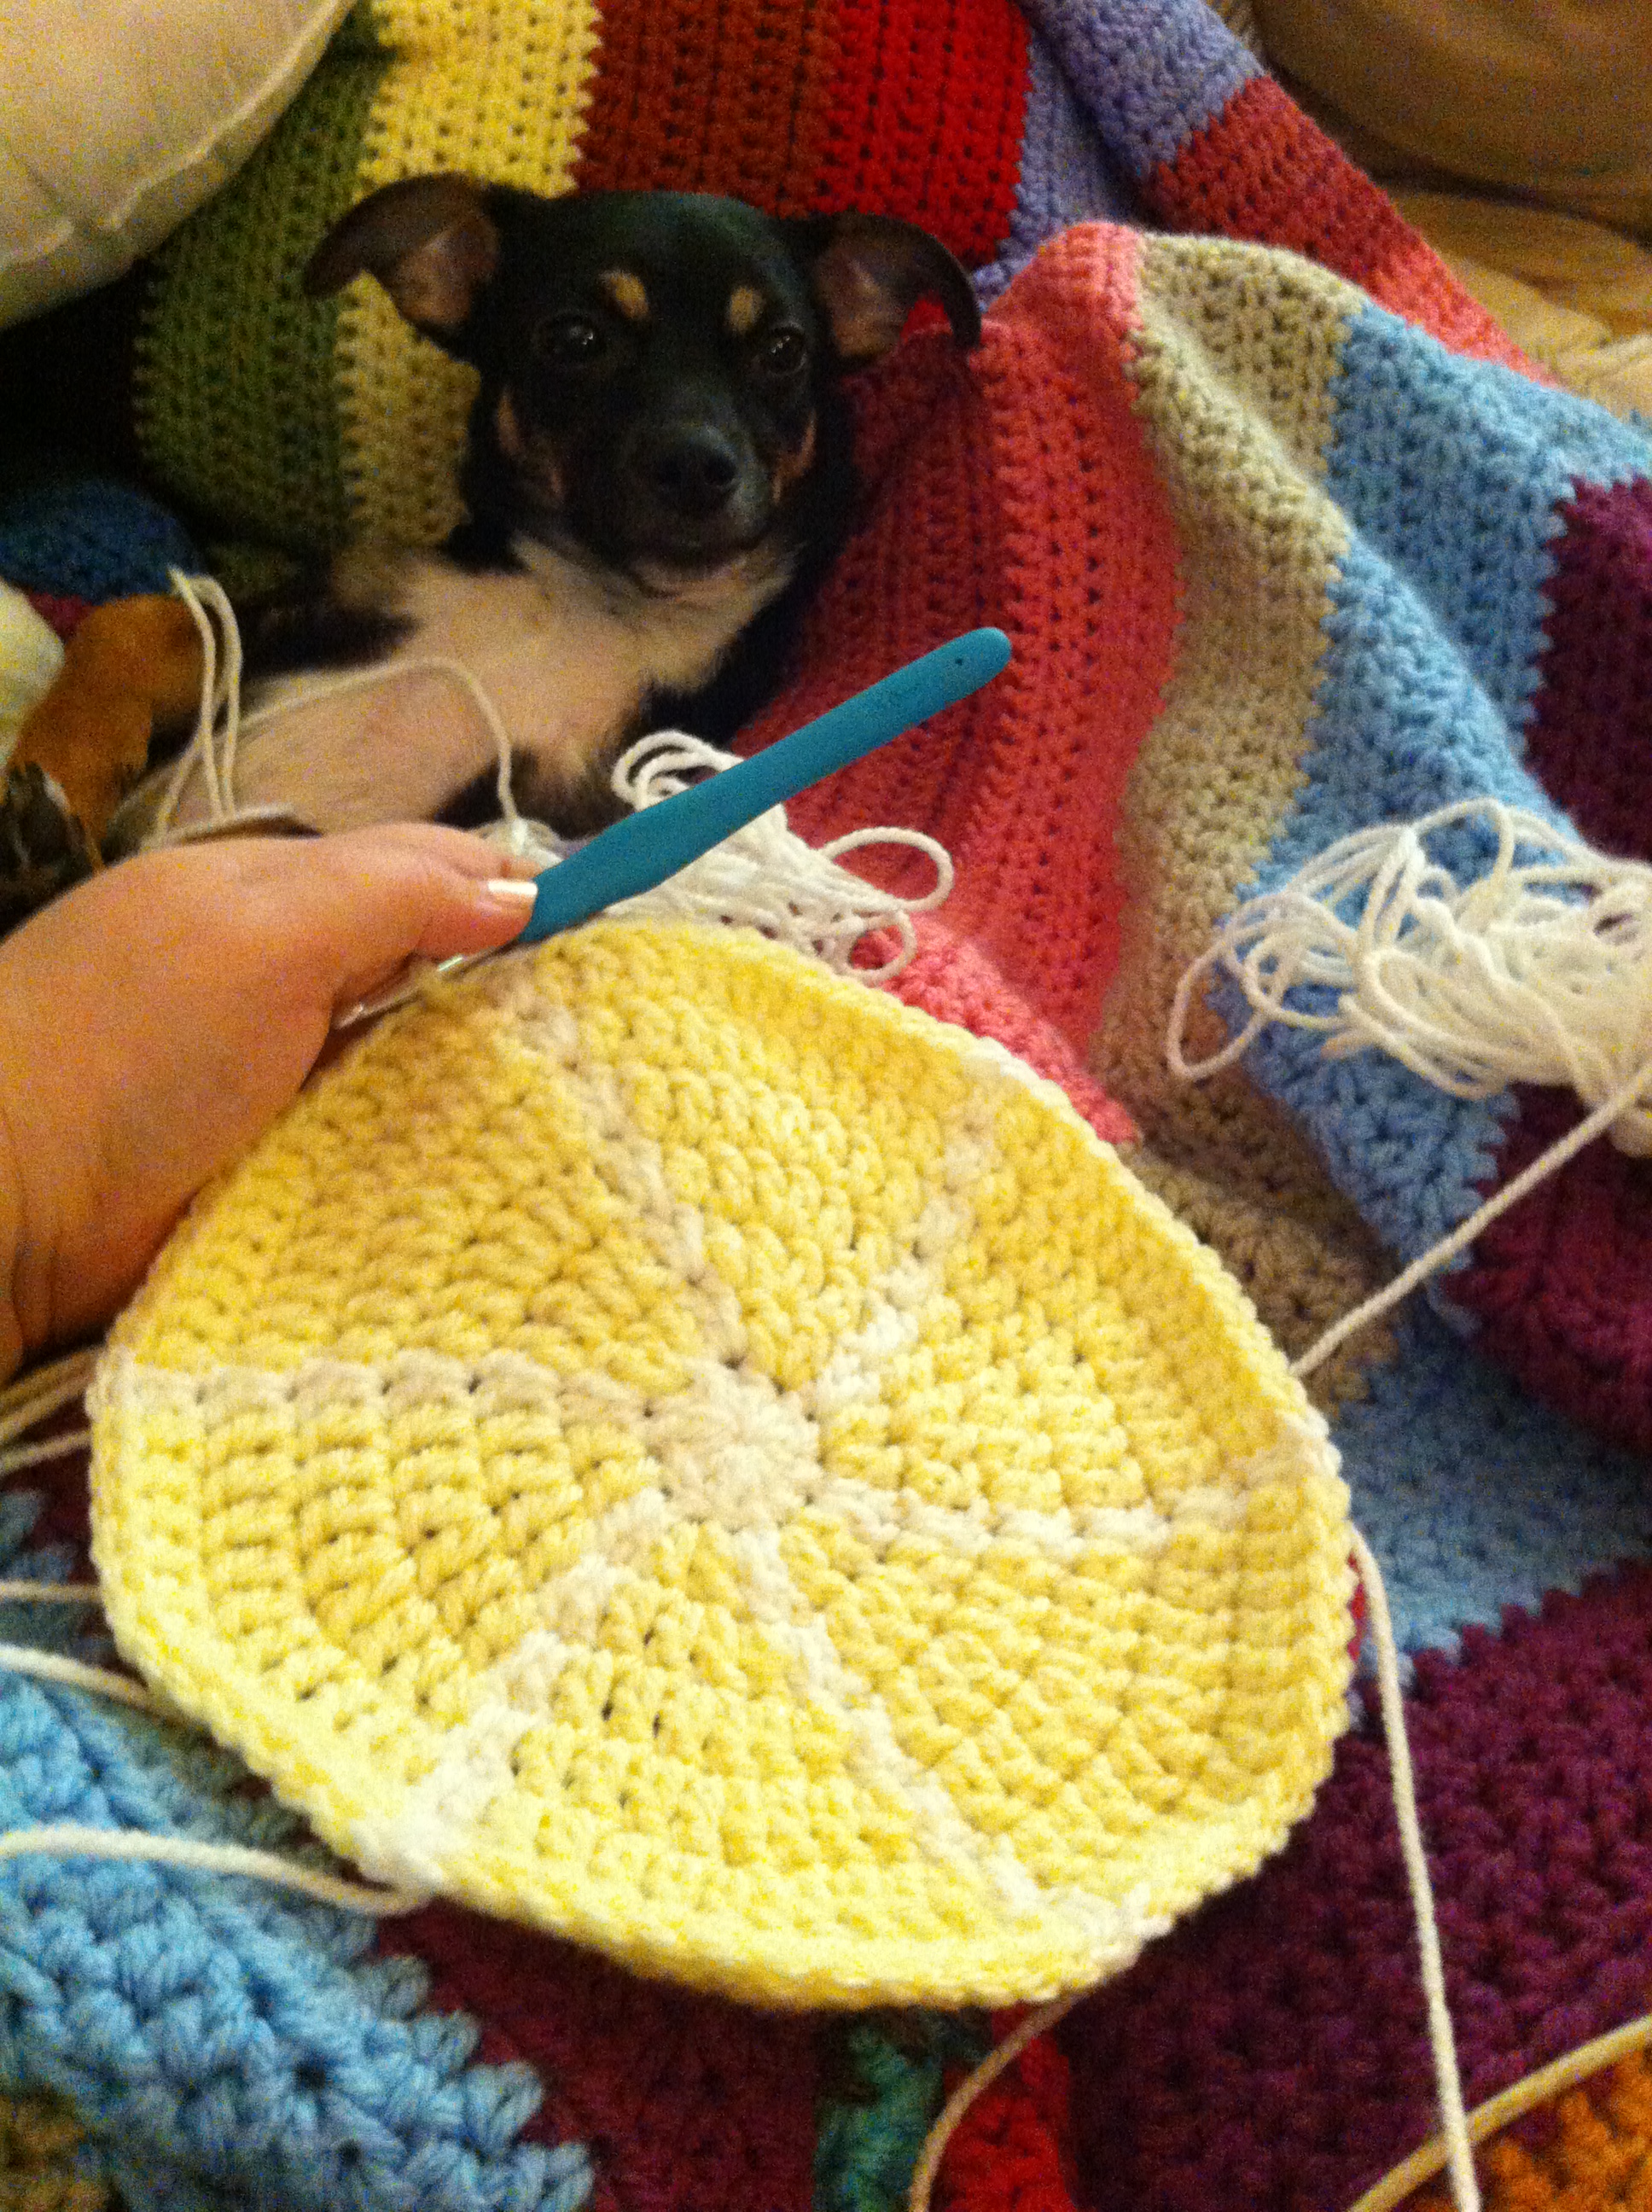
Sleeping dog optional!!
Abbreviations – us terms
dc = double crochet
sc = single crochet
ss = slip stitch
hdc = half double crochet
ch = chain
White Yarn instructions…
Because I did not want to have a lot of ends to sew in or to carry the white yarn around I ended up cutting pieces of white yarn into approx 3 metre lengths (5 in total) and the original ball to give me 6 balls to work with.
Changing yarns: (apologies for the awful pictures the light in here is terrible!)
This pattern relies on quite a few yarn changes my method for changing yarn is…
with colour a yarn over hook, insert hook into stitch, yarn over hook, pull through stitch, (3 loops on hook), yarn over and pull through first 2 stitches (2 loops on hook), using the new colour yarn, pull through remaining 2 stitches on hook(1 loop on hook)
You then continue the next stitch/s with the new colour
The Pattern.
Rd 1 – to begin using your original ball of white yarn make a magic circle and chain 2 (the chain two does not count as a stitch) then do 12 dc into the circle and ss into the top of the first dc and fasten off.
Rd 2 – join colour b in any stitch and chain 2, dc into the same stitch. Next you will dc again into the same stitch but this time you will also be joining another of the balls of white yarn.
(When making stitches with white yarn I always do my stitches over the yellow (or what ever colour you are using) so that is carries it along for the next time I need to pick it up.)
With white yarn dc into next stitch then dc again into the same stitch – on the second dc you will be changing back to your colour b – do not break the white yarn as you will be picking this up again on subsequent rounds
*With colour b dc into next stitch twice, on the second dc you will be joining another of your balls of white yarn.
With white dc twice into the next stitch, on the second dc you will be picking up and rejoining colour b*
repeat from * to * 4 more times – you should end up with 24 stitches in total. 6 sets of white and 6 sets of colour b and colour b on your hook ready for round 3.
And more tails than you know what to do with!!
Rd 3 – colour b – chain 2, dc in same stitch, 2 dc in next stitch, in the next stitch you will want to dc but change to white picking up the yarn from the first change in the previous round.
Using the white yarn dc into the next stitch twice, and change back to colour b
the white stitches are always increases.
*With colour b dc in next stitch, 2 dc in next, dc in next change to the next ball of white from previous round
with white 2 dc in next stitch changing back to colour b*
continue * to * around ss to join, you should have 36 stitches, 6 sets of white stitches
end of round 3
Round 4:
With colour b chain 2, dc into same stitch, dc in next stitch, two dc in next changing to white yarn
with white dc twice into next stitch changing back to colour b
*With colour b dc into next 2 stitches, two dc in next, dc in next two stitches changing to white yarn
with white dc twice into next stitch changing back to colour b*
repeat from * to * around ss to join – you should end up with 48 stitches and 6 sets of white stitches
end of rd 4back of work at end of round 4
The back looks kinda messy so at this point I sew in the ends that I will not be working with – that way you end up with only the 6 tails of white that you are crocheting with and colour b.
after sewing in
Much tidier!
Rd 5:
With colour b chain 2, dc in same stitch, dc in next, dc in next, dc twice in next, dc in next 3 stitches and change to white yarn on the last dc,
with white yarn dc twice in same stitch and change back to colour b
*With colour b, dc in next 3 stitches, dc twice in next, dc in next 3 stitches and change to white yarn
with white yarn dc twice in same stitch change back to colour b*
repeat from * to * around ss to join you should have 60 stitches and 6 sets of white stitches
end of round 5
Rd 6:
With colour b chain 2 and dc into same stitch dc in next 3 stitches, dc twice in next, dc in next 4 stitches and change to white yarn
with white, dc twice in next stitch
*With colour b, dc in next 4 stitches, dc twice in next, dc in next 4 stitches changing to white yarn
with white dc twice in next stitch changing to colour b*
repeat from * to * around and ss to join, you should have 72 stitches with 6 sets of white stitches
end of round 6
Rd 7:
With colour b chain 2 and dc into same stitch, dc into next 4 stitches then dc twice into next, dc in next 5 stitches changing to white yarn
with white, dc twice into next stitch, change to colour b,
*with colour b dc into next 5 stitches, dc twice into next, dc into next 5 stitches and change to white yarn
with white dc twice into next stitch change back to colour b*
repeat from * to * ss to join, you should have 84 stitches with 6 sets of white stitches
end of round 7 and someone is awake!!
Rd 8:
With colour b chain 2 and dc into same stitch, dc into next 5 stitches, dc twice in next, dc in next 6 stitches, changing to white yarn
with white, dc twice in next stitch changing to colour b
*with colour b, dc into next 6 stitches, dc twice in next, dc into next 6 stitches, changing to white yarn
with white dc twice into next stitch, changing to colour b*
repeat from * to * around ss to join, you should have 96 stitches with 6 sets of white stitches
end of round 8
Rd 9:
With colour b chain 2 and dc into same stitch, dc into next 6 stitches, dc twice in next, dc into next 7 stitches changing to white yarn
with white dc twice in next stitch, changing to colour b
*with colour b dc into next 7 stitches, dc twice in next, dc in next 7 stitches changing to white yarn
with white dc twice in next, changing to colour b*
repeat from * to * around and ss to join, you should have 108 stitches with 6 sets of white
end of round 9
.
Rd 10,
With colour b chain 2 and dc into same stitch, dc into next 7 stitches, dc twice in next, dc into next 8 change to white yarn
with white dc twice into next stitch changing to colour b
*with colour b dc into next 8 stitches, dc twice in next, dc into next 8 change to white yarn
with white dc twice into next stitch changing to colour b*
repeat from * to * around and ss to join, you should have 120 stitches with 6 sets of white
It would appear that I forgot to take a pick of round 10 so here is another of my dog!
Rd 11:
With colour b chain 2 and dc into same stitch, dc into next 8 stitches, dc twice in next, dc into next 9 change to white yarn
with white dc twice into next stitch changing to colour b
*with colour b dc into next 9 stitches, dc twice in next, dc into next 9 change to white yarn
with white dc twice into next stitch changing to colour b*
repeat from * to * around and ss to join and break yarn snip ends to manageable lengths leaving enough to weave in and to free up your large ball of white yarn , you should have 132 stitches with 6 sets of white
end of round 11
Thats the end of the fiddling around with colour changes!! woohoo!! Now to add the pith.
Rd 12.
Attach white yarn in same stitch as ss
chain 2 and dc in same space, dc in next 9 stitches, dc twice in next, *dc in next 10 stitches, dc twice in next*(these should line up with your sets of white stitch increases)
Repeat from * to * around ss to join – you should have 144 stitches
attaching white yarn
end of round 12
Rd 13
chain 2 and dc in same space, dc in next 10 stitches, dc twice in next, *dc in next 11 stitches, dc twice in next*
Repeat from * to * around ss to join – you should have 156 stitches
end of round 13
Rd 14 join colour a in any stitch
Chain 1 (does not count as stitch)
Hdc around and ss to close, break yarn and weave in ends
end of round 14
back of work
Now for the back or ‘skin’ side!
Rd 1
With colour a make a magic ring and chain 2, dc 12 times into ring and ss into top of first dc to close.
round 1 of back
Rd 2 – chain 2 and dc into same stitch, dc twice in each stitch around, ss in top of first dc to close
Rd 3 – chain 2 and dc into same stitch, dc twice in next, *dc in next, dc twice in next* repeat from * to * around, ss in top of first dc to close
Rd 4 – chain 2 and dc into same stitch, dc in next, dc twice in next, *dc in next 2 stitches, dc twice in next* repeat from * to * around, ss in top of first dc to close
Rd 5 – chain 2 and dc into same stitch, dc in next 2, dc twice in next, *dc in next 3 stitches, dc twice in next* repeat from * to * around, ss in top of first dc to close
Rd 6 – chain 2 and dc into same stitch, dc in next 3, dc twice in next, *dc in next 4 stitches, dc twice in next* repeat from * to * around, ss in top of first dc to close
Rd 7 – chain 2 and dc into same stitch, dc in next 4, dc twice in next, *dc in next 5 stitches, dc twice in next* repeat from * to * around, ss in top of first dc to close
Rd 8 – chain 2 and dc into same stitch, dc in next 5, dc twice in next, *dc in next 6 stitches, dc twice in next* repeat from * to * around, ss in top of first dc to close
Rd 9 – chain 2 and dc into same stitch, dc in next 6, dc twice in next, *dc in next 7 stitches, dc twice in next* repeat from * to * around, ss in top of first dc to close
Rd 10 – chain 2 and dc into same stitch, dc in next 7, dc twice in next, *dc in next 8 stitches, dc twice in next* repeat from * to * around, ss in top of first dc to close
Rd 11 – chain 2 and dc into same stitch, dc in next 8, dc twice in next, *dc in next 9 stitches, dc twice in next* repeat from * to * around, ss in top of first dc to close
Rd 12 – chain 2 and dc into same stitch, dc in next 9, dc twice in next, *dc in next 10 stitches, dc twice in next* repeat from * to * around, ss in top of first dc to close
Rd 13 – chain 2 and dc into same stitch, dc in next 10, dc twice in next, *dc in next 11 stitches, dc twice in next* repeat from * to * around, ss in top of first dc to close
Rd 14 – Chain 1 and hdc in same stitch, hdc around, ss to join, do not break yarn
end of row 14 of back
Now we just need to sc the two pieces together!
joining
line up the two pieces right sides facing out – chain 1 and sc in the same stitch through both pieces, sc in each stitch until you are about 3/4 of the way round, at this point you can if you prefer insert a zip – I was requested not to add a zip – insert your cushion inner between the two pieces and continue to sc around both pieces until closed, ss to join and weave in ends.
And you should have a zesty squishy soft cushion of lemon slice goodness!
finished!!
Change up the colours to have yourself a citrus party!
orange, lemon, lime
I hope you like the pattern and its not too badly written to follow! I shall make a post about the other fruity cushions I am making soon!
if you share this pattern anywhere or make items to sell please give credit to anonymouse or link back to the blog