

Oops! It would appear that I have left this blog alone for far longer than anticipated! The last year has been a rollercoaster! I had to move house as my landlord was selling up, there was the suspected brain tumour, my folks in and out of hospital and new editions to the family since I last wrote about my crochet adventures here.


Meet Oswald and Frank my new kitten and Gecko!
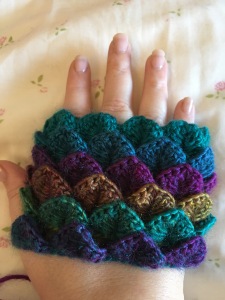
Though I have been crocheting I have been crazy busy settling in and adapting to my new life. That was until I saw the most gorgeous gloves pop up on my facebook and had to try and make my own.
There are several patterns for ‘dragonscale gloves’ on ravelry but I wanted to see if I could figure out a way to make them myself. So far I have made 3 pairs for myself and xmas gifts (best to start on those early after last year ended up rushed and with a nasty case of carpal tunnel!)
Anyways that is enough about me – on to the pattern!
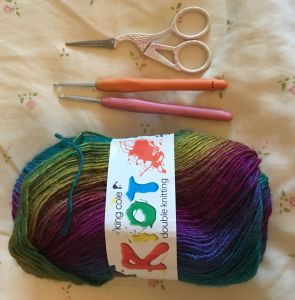
You will need:
1 ball of Yarn – I used King Cole Riot DK, I love the colours and that it is thin so the crocodile stitches round the palms do not get too bulky which would be annoying
3.5mm and 3mm hooks
Scissors
Needle to weave in ends
The stitches: I use American crochet terms throughout
Ch = chain
SS = slip stitch
SC = single crochet
HDC = half double crochet
DC = double crochet
V = DC, ch1, DC in same stitch
Crocodile stitch:
You will also need to know how to do the crocodile stitch – I have tried to include pictures and instructions but if you are new to this stitch (as I was) you can find a fantastic beginners tutorial from Red Heart Yarns here… Crocodile stitch tutorial
Granny stitch
The granny stitch is three dc’s into the same stitch
The Pattern!
Round 1 – Using your 3.5mm hook chain 36 then making sure the chain is not twisted, slip stitch into the beginning chain to create a circle (to make the gloves larger or smaller chain fewer or more stitches making sure they are a multiple of 4).
Round 2 – Ch1 and SC into the same stitch then place one single crochet in each chain around, SS into the first SC (36 st)


Switch to your 3mm hook
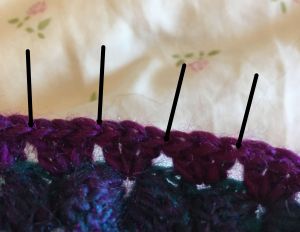
Round 3 – Chain 4 (counts as dc + ch1) and dc into same stitch (your first V stitch), ch 1, skip the next stitch and dc into the next, *ch1, skip the next stitch and V stitch into the next, ch 1, skip the next stitch and dc into the next * repeat around – you should end on a dc stitch, ch1 and slip stitch into the 3rd chain of your chain 4. ( 9 ‘v’ and 9 dc’s)


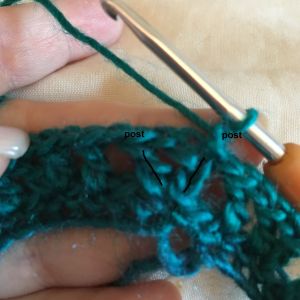
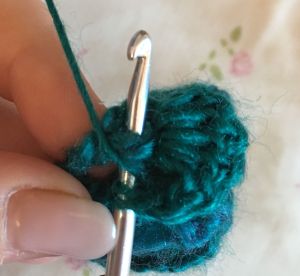
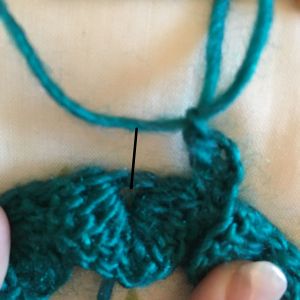
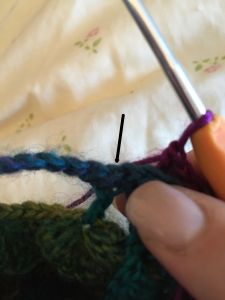
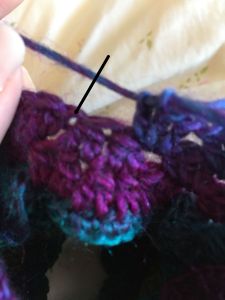
Round 4 – time for the first crocodile stitch!
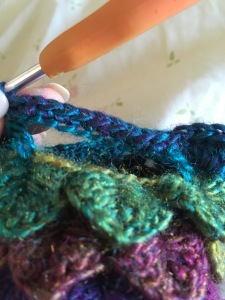
You will be crocheting around the posts of the dc’s – 5 dc’s down one side of the V, chaining one then 5 dc’s up the other side of the V.
Yarn over hook, insert hook under the first dc of your first V, yarn over, pull yarn through two hoops. Yarn over, pull yarn through the remaining two hoops, repeat 4 more times working down the post,
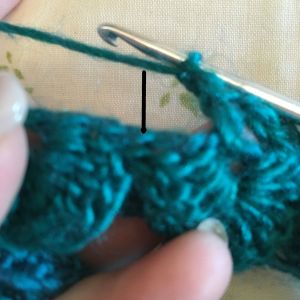
Chain 1, you will now do the same up the second dc post of the V
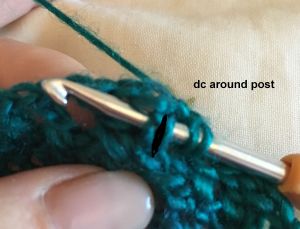
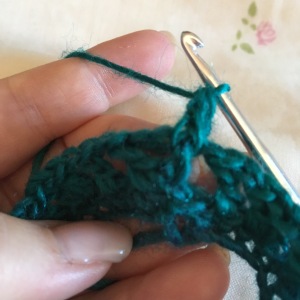


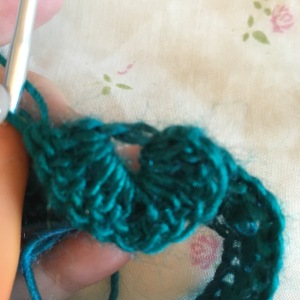


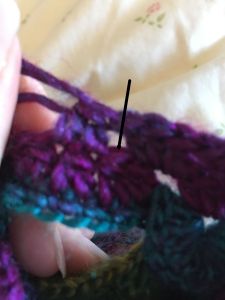
Repeat around creating crocodile stitches around the V’s and anchoring them in place by slip stitching around the posts of the dc’s until you have gone all the way around – on the last slip stitch, instead of stitching around the dc post slip stitch into the top of the stitch. ( 9 crocodile stitches)
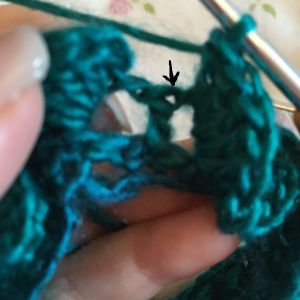
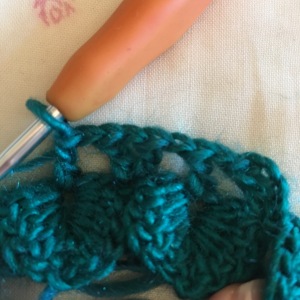
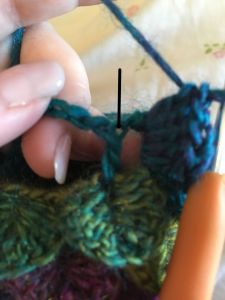
Round 5 – Chain 4 and dc into same stitch, *ch1 and dc into space of next crocodile stitch, ch1 and V stitch into the top of the dc from the last round* repeat from * to * around, SS into 3rd chain of chain 4
Round 6 – Repeat rd 4
Round 7 – Repeat rd 3
Round 8 – Repeat rd 4
Round 9 – Repeat rd 3
Round 10 – Repeat rd 4
Round 11 – Repeat row 3
Round 12 – Repeat row 4
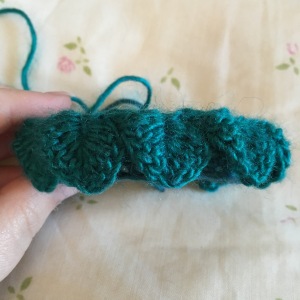
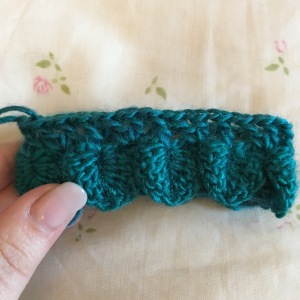
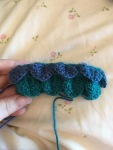
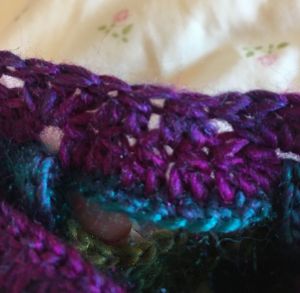
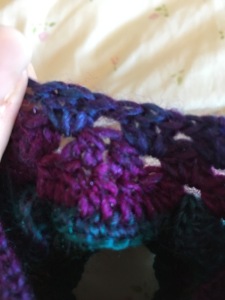
You should now have 5 rows of crocodile stitch – this is long enough me but feel free to add more rows if you want longer finger and hand parts of the gloves.


Round 13 – chain 4 and dc into same stitch, ch1, dc into the middle of the next crocodile stitch , ch 10 (this begins the thumb shaping), skip one crocodile stitch and dc into the center of the next crocodile stitch, *ch 1 v stitch into the dc from the previous round, ch1 and dc into the middle of the next crocodile stitch* repeat from * to * around, slip stitch into the 3rd chain of your chain 4

Ch 3 and dc twice more into the same stitch, dc three times into the middle of the next crocodile stitch, find the SC you did into the top of the dc in the previous round – dc that and the next SC together, dc2tog 5 more times, you should now have 6 dc2tog in total. *Dc 3 times into the middle of the next crocodile stitch, dc 3 times into the top of the dc from previous round* , repeat ** around and slip stitch into the top of your chain 3.


Round 17 – Slip Stitch to the next gap, ch 3 and 2 dc in same space, granny stitch into the next space, skip both dc2tog and granny stitch into the next gap, granny stitch in each gap around, SS into top of chain 3

Repeat round 18 until you reach the desired length – I have found that 13 more rows are perfect for me and with this wool ensures the colour change is not too different when you make the second glove.
I finished off with a round of hdc but you can add any border you fancy!
All that’s left to do is weave in those ends. The second glove is made in exactly the same way!


I hope this all makes some sort of sense – apologies for the picture quality, let me know if you find any mistakes!!


Love the gloves (hint hint) 😊 No idea what you are talking about (can’t crochet) but the nails look fab lol x
LikeLiked by 1 person
haha ty ty x
LikeLike